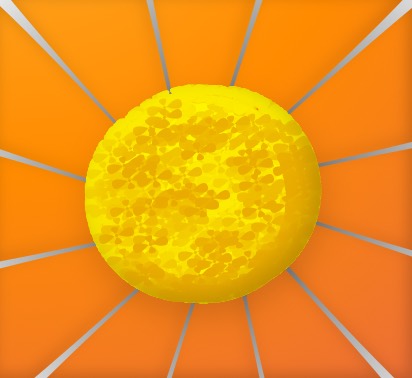
The Flower Icon
I’ve been using Acorn’s vector tools for a few years already. But Acorn 5 allowed me to literally abuse thanks to the shape processor1. And this resulted in the cute flower icon I now use in Sim Daltonism 2.
So how do we make that flower using Acorn 5? First we draw a shape for a petal, then we use the shape processor to make 12 copies, align them into a circle, and finally rotate them so they point all in the right direction. Easy since that’s exactly what the shape processor was designed to do.

But what about the disk in the middle? That’s a bit trickier, but we’ll still be using the shape processor. The idea is to have a lot of small shapes being placed semi-randomly in a circle and forming some sort of not-exactly regular gradient giving some apparence of volume.
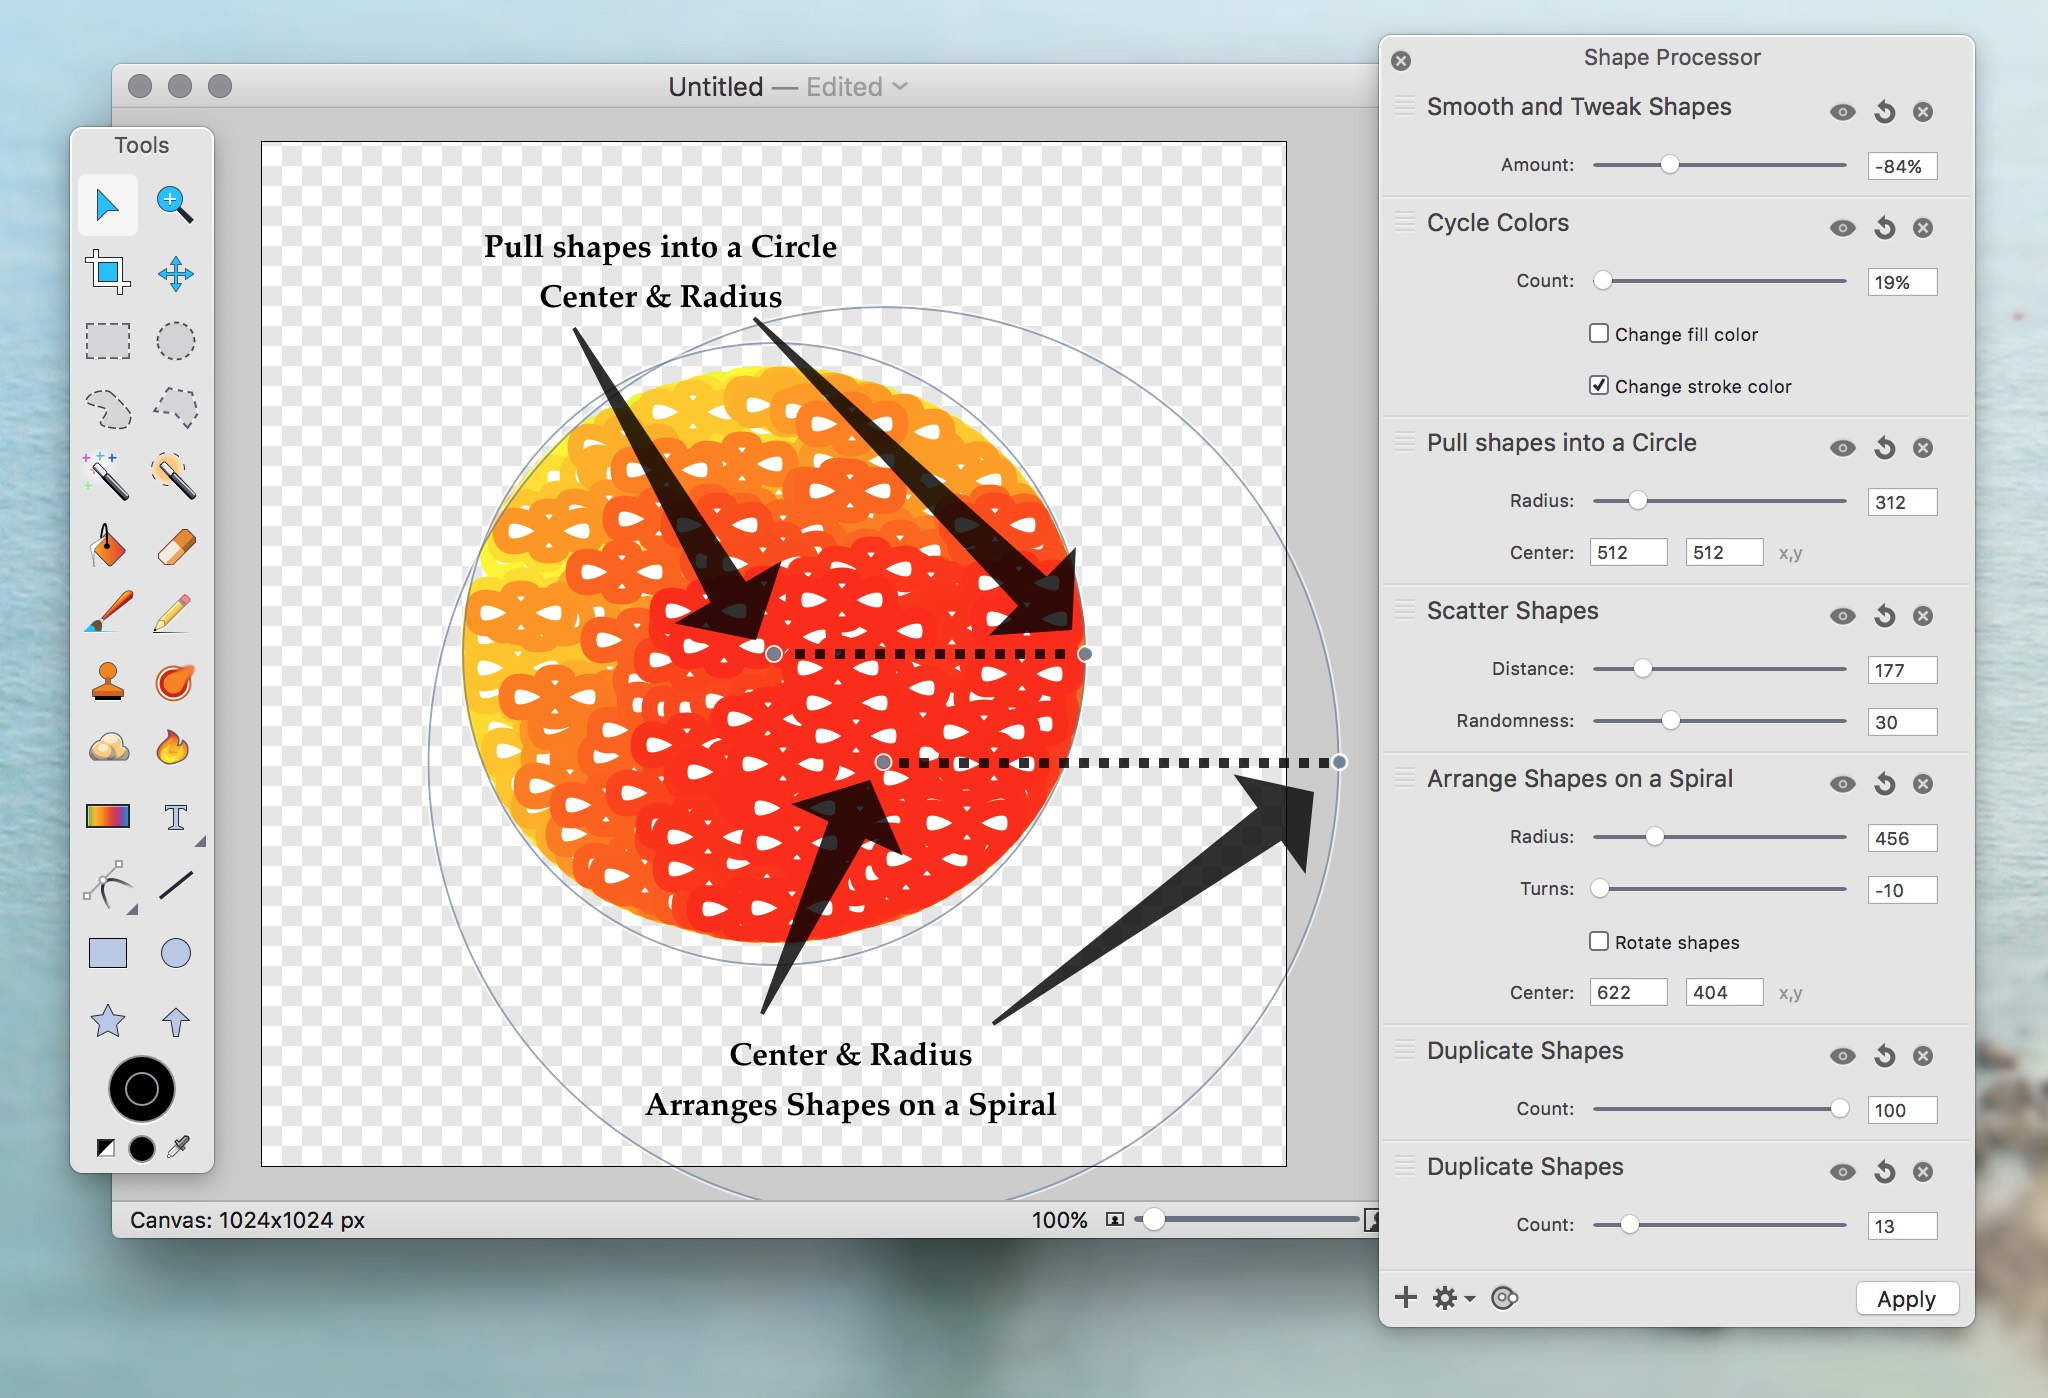
So here’s how: we start by drawing a small shape. Here I took an oval. Then we add a shape processor to duplicate this shape. Make a lot of them! The shape processor only allows us to make 100 duplicates, but if we need more we can stack up two duplicate processors one after the other: the second processor will duplicate all the shapes generated by the first processor, making the total number of shapes a multiplication.
Then we add a processor to arrange those shapes in a spiral, and another to cycle the color of the shapes. (It’s a bit inconvenient that we can only colorize using colors from the spectrum, but we can deal with that later with a Color Monochrome layer filter.) What the spiral does is put each shape at the approximative position we want them. If we want the bright spot to be at some place, adjust the parameters for those two filters to be there.
We don’t really want those shapes to be in a spiral, so let’s add a scatter processor. The idea is to arrange the scattering distance to get some sort of gradient from the shapes in the spiral.
Finally, we add a processor to pull all those shapes in a circle. The circle will need to be a bit smaller than the spiral, and for our fake gradient to work we need to make its center offset from the spiral’s center.
For my flower I added a smooth and tweak shapes processor to make those ovals no longer oval. That’s not necessary if we start from the right shape, but we can’t tweak the underlying shape without removing all the shape processors (and losing their settings). That said, we can tweak the parameters for all the processors and see how they affect the end result, so we can use this shape processor that does something to our shapes based on the value from a slider to change them a bit. All this to say that you might want to make sure you start from the shape you want right at the beginning.
I made a small test file you can download to experiment with. You’ll need Acorn 5 to open it and play with the shape processor. It looks like this:

By tweaking the spiral and scattering parameters you can acheive various levels of uneveness in the color distribution.
Remember when I said I abused the shape processor for making the icon for Sim Daltonism? The test file above has 1,300 shapes. Sim Daltonism’s flower has more than 22,000 shapes. It turns out that manipulating a big number of shape is not Acorn’s forte. You should probably avoid creating that many unless you like Acorn stalling on you when you manipulate those overpopulated shape layers. Either that, or you you could also rasterize the shape layer.
And if you want to have fun stalling Acorn, feel free to play with the Acorn file with all the 22,000 shapes in Sim Daltonism’s Github repository, here. Unfortunately, the processors have all been applied in that file so you can no longer tweak their parameters.
That concludes how to abuse of Acorn’s shape processor to make beautiful flowers. I hope you liked it.
-
The shape processor is the new system in Acorn 5 allowing us to generate, move, and distord shapes in a similar way as applying filters to a layer. ↩︎