Blog

PHP Markdown's no-markup mode

I’ve been contacted many times by people asking about how to disable HTML within PHP Markdown. Up until a few months ago, I was opposed to offering that possibility on the ground that HTML is part of the Markdown syntax. After all, Markdown was designed so that if the syntax doesn’t have what you want, or if you just don’t know the syntax, you can fallback to HTML.

Removing HTML support in that context would mean more pressure to implement a Markdown-specific syntax for things that Markdown (with HTML) doesn’t really need. It also force people to learn the syntax because they can’t use HTML anymore. The better option, it seems to me, is to simply restrict what HTML tags and attributes can be used within Markdown.

But I kept receiving questions about how to best disable HTML within PHP Markdown, and for various reasons many weren’t impressed much by my arguments. And the technical answer wasn’t very straightforward: unless you want to sacrifice code blocks and spans, and automatic links, you just can’t escape in advance the less-than < character used to open a tag.

Basically, many people implemented it wrong without even noticing (because they don’t use much automatic links or code blocks and spans). It appeared to me that this was more harmful to users trying to learn Markdown than the lack of HTML fallback. So I changed my stance about the problem and decided to help those who want to disable HTML completely.

If you want to disable HTML in PHP Markdown, please don’t hack.

PHP Markdown has a (hidden) setting in its latest version to do exactly that. Just instantiate a parser yourself and set the no_markup property this way:

$parser = new Markdown_Parser; // or MarkdownExtra_Parser
$parser->no_markup = true;
$html = $parser->transform($text);

There’s also a no_entities property you can set the same way if you want to disallow character entities.

Note that by forbidding HTML markup you’re denying the users of your script, CMS, or web application the necessary fallback for elements Markdown does not provide, such as <sup> and <sub>, <ins> and <del>, <q>, <bdo>, <abbr>, <object> (required to embed video), and many others. A better idea may be to just filter out the HTML output for unwanted HTML, using something such as kses, but I’ll let you be the juge of what’s best for you and your users.

With power comes responsibilities: please make sure your users have the best Markdown experience you can offer them. Thanks.


Using the D/Objective-C Bridge

Perhaps you’re someone interested in the bridge between language D and Objective-C I introduced last week. Last week article was more about how to solve the various problems so that it just work. Today, I’ll explain how you can use the bridge with the Decagon demo app (part of the downloadable package for the D/Objective-C Xcode project).

So if you’ve downloaded the package, you have an Xcode project, a bunch of D code file and a few application resource. Seen from inside Xcode, it looks like this:

If you open the decagon group (which mirrors the decagon folder in the filesystem) you’ll see three code files: “adder.d”, “controller.d”, “main.d”. Each of these constitute a module in D parlance.

Let’s first take a glance at decagon’s main module. Since I do not expect all my readers to be fluent in D, I’ll start by explaining things a few more than I’d do normally.

The first line (under the license, that is) reads like this:

module decagon.main;

This simply declare that we’re in module “decagon.main”. The module declaration isn’t required, but can be helpful to detect module mismatch — when the file located at one place does not correspond to what it is supposed to be. This particular declaration means that we’re in file “main.d” inside the “decagon” folder, and this is how the compiler is expected to find this module. Now, let’s go to the more interesting stuff:

import decagon.adder;
import decagon.controller;
import cocoa.cocoa;

The first import search for the file “adder.d” inside the “decagon” folder, reads it and make all it’s symbols accessible in this module scope. The second one does the same for “controller.d”. The last one imports all the symbols from the bridged Cocoa framework.

int main(char[][] args) {

This is simply the declaration for the main function. If you’re wondering about the argument type, char[][], it’s an array of arrays of characters. Since an array of characters is generally called a string, we can call this an array of strings, and since arrays know their length in D, we don’t need an argc argument to tell us how many argument there is (args.length does the job.)

But let’s go back to our main topic an inspect what the main function does. It begins with this:

    // Initialize controller classes before loading nib file by getting
    // its objcClass property.
    AppController.objcClass;
    AdderController.objcClass;

First, we’re getting a pointer to the Objective-C class definition for AppController and AdderController. First, what are those controllers? Remember the “decagon.adder” and “decagon.controller” modules? Those are classes from these from out there.

Second, why are we getting that, or what’s the point of getting a variable and storing it nowhere? The answer is that objcClass isn’t a variable, it’s a property (a function in short). Getting this property will not only get a pointer to the class definition, but if the class hasn’t already been initialized and registered with the Objective-C runtime, it’ll be. Since this is the first code which gets executed in the app, it’s pretty certain they haven’t been initialized and the whole point of getting the property is to do that initialization, not getting the value.

    auto app = new NSApplication;

Ah, now that’s serious: we’re creating a new application. If you’re wondering, the auto keyword in D just means to deduce automatically the type from the assignment on the right. So now we have declared variable app, of type NSApplication and initialized it with a new application.

    NSApplication.loadNib("Main.nib", app);

Here we’re loading the “Main.nib” file which contains a serialization of our user interface elements. This file instantiate and connect windows, menus, and controllers as it has been defined in Interface Builder… did I just say controllers? Perhaps this reminds you of the two classes we’ve initialized at the start of the main function. That wasn’t for nothing: it allowed the nib file to actually create an instance of each of these to classes and to plug the right objects to their exposed outlets. Now our two controllers (which we haven’t visited yet) are ready to do their job.

    app.run();

Yeah, now we run the application. This will enter in a run loop and exit when the terminate method on the application is called, at which time it’ll be time to end the main function with a magnificent:

    return 0;
}

Good. Now, let’s go see this mysterious AdderController class. Follow me in the “decagon/adder.d” file. I’ll skip the comments and only show you the code from now on.

After a few lines of imports, we can see a class declaration:

class AdderController : ObjcObject {

As you can guess, this defines a new class. Note that ObjcObject is an interface, not a class, so the superclass isn’t as it would seem: ObjcObject. No, the superclass, the class this AdderController class is derived from, is the base class Object at the root of every object in D. ObjcObject is only an interface and was added because if we didn’t, a polite error message would have told us to put it in — the ObjcObject interface is required when creating a subclass which must expose methods to the Objective-C side of the application.

Going further, we see three member variables in our class:

    NSControl firstValueField;
    NSControl secondValueField;
    NSControl resultField;

These are of type NSControl. Nothing spectacular here, move on.

Oh, what do we have next? Is it dark magic?

    mixin IBOutlet!(firstValueField, "firstValueField");
    mixin IBOutlet!(secondValueField, "secondValueField");
    mixin IBOutlet!(resultField, "resultField");

No. It’s magic alright, but it’s D template magic.1 Basically, this creates an “outlet” in which Interface Builder, and the nib file it produce, can connect other objects. When loading the nib file (remember in the main function?), the three member variables above are connected to their corresponding controls, “magically”.

    mixin ObjcBindInitializer!("init");

That’s simply something to bind the init Objective-C method to our class default constructor. It’s needed because we want Interface Builder to call our constructor when instanciating the controller.2

    void calculate(Object sender) {
        resultField.floatValue =
            firstValueField.floatValue + secondValueField.floatValue;
    }

Oh, wow. Now we have a function adding the value of the two fields and putting and setting it to the third.

    mixin IBAction!(calculate);

Magic again? You bet.3 This makes the calculate function above a possible target for actions specified in the nib file. When a button is clicked, that button fire an action to it’s target and the target handles it. Our class is ready to receive calculate actions.

And that’s all for our AdderCountroller class as this closing brace tells us:

}

So what happens again when the application starts? First it initializes our controller’s Objective-C classes, then the application object is created, then the nib file is loaded, instantiating our controller and connecting its outlet, and then the application runs, waiting in a loop for user input.

If you inspect the nib file, you’ll see that the calculate method is the target of the two first text fields in the adder window: when one field value changes, it calls the calculate method on our controller which calculate the result and set it to the result text field.

Great, we now have great application to do additions! :-)

What is the other controller in “decagon/controller.d” about? Well, by looking at it we can see it has two actions: openWebsite and openWindow which more or less do what they’re supposed to do (remember that it’s an early demo app). Then there are two more intriguing methods: openUntitledFile and shouldTerminateAfterLastWindowClosed. Those are application delegate methods. Our controller is connected to the delegate outlet of the application, and the application sends to its delegate messages when certain actions occur, or when it needs to know about certain things. The delegate isn’t required to respond to everything, it may only implement a few methods. This is what we’re doing here: defining two application delegate methods.

The first method (openUntitledFile) is called when the application wants to open a new untitled file after launch or in reaction to a click on its dock icon. Because Objective-C objects can’t see methods in D objects, the method need to be bound to an Objective-C selector. To do that, we need to know the selector name (which is the name of the method in Objective-C where each argument is represented by a single colon), the return type and the argument types.

So, to make callable from Objective-C the following D method:

bool openUntitledFile(NSApplication sender);

we mixin this template4:

mixin ObjcBindMethod!(openUntitledFile, bool, 
    "applicationOpenUntitledFile:", NSApplication);

which takes as argument the method to bind, the return type, the corresponding Objective-C selector, followed by the type of each arguments.

The second method (shouldTerminateAfterLastWindowClosed) is called when the last window of the application is closed to determine if the application should terminate. The method is bound much in the same way as above.

So this completes our tour of Decagon 0.1. I hope it has been interesting and that you’ll give the D/Objective-C bridge a try. You can download the Xcode project for the bridge and Decagon from the D/Objective-C bridge project page. You also need the GDC compiler for D and the D plugin for Xcode (links are on the project page). There is also a mailing list you can subscribe to if you need help or want to ask questions.


  1. It’s not magic enough to my taste however. I don’t like how the variable name has to be repeated in a string as the second template argument. Anyone with a bright (and working) idea of how to get the name of the aliased member variable from a template is welcome. ↩︎

  2. The next version of the bridge (which I’m preparing) will make this line optional: if there is a default constructor (with no arguments) and no explicitly declared initializer (with ObjcBindInitializer), then the init method will automatically be bound to that default constructor. ↩︎

  3. Notice how for actions you don’t have to specify the name as the second argument? That’s because it’s easy to get the name of an aliased method, while it’s not possible (that I know of) to get the name of an aliased variable. ↩︎

  4. This template has the wrong return type in version 0.1 of Decagon (void). This has been corrected in this article and will be fixed with the next release of the D/Objective-C bridge. ↩︎


Extended warranties are a funny thing

We buy a computer, or a home appliance, and we are always offered an extended warranty which spans longer than the base manufacturer warranty. It’s well known that these warranties are very profitable for sellers, and it’s certain that it is because, on average, the repair costs are well under the cost of the warranty. Only on that point of view, we’d be better of by paying ourself for the repairs.

But there’s something even stranger to extended warranties: they generally offer nothing which isn’t already covered (for free) in Quebec by the Loi sur la protection du consommateur (Consumer Protection Act). Let me translate a few points from the act:

  1. This section applies to a contract for a sale or rent of goods and to a service contract.

Ok, so now we know what the law is talking about when it speaks of contract. Let’s skip to the good stuff:

  1. A good which is subject to a contract must be capable of serving to the usage it is normally destined.

  2. A good which is subject to a contract must be capable of serving a normal usage for a reasonable time, in accordance to its price, dispositions of the contract, and normal usage condition for the good.

So if a seller tells us the device is going to last 10 years, that the price is fair, and it breaks after only two years, then the seller is at fault.

  1. The consumer who contracted with a merchant has the right to directly exerce against the merchant or the manufacturer a recourse based on an obligation from article 37, 38, or 39.

So, if such device breaks after two years, even if the base warranty has expired, you can ask to the seller to repair it; if he doesn’t you can fill a complain at the Office de protection du consommateur (Consumer Protection Office) and fill a suit to the small claims court. That’s my opinion, and it matches what Option consommateurs has to say on the subject.

So, the extended warranty, in addition to cost much more than what it would probably cost for all the repairs it covers, does rarely cover anything more than what is already covered by Quebec’s law. Its only advantage would be to make merchants a little less reluctant to comply, but how much is that worth?


The D/Objective-C Bridge

There’s an interesting thing about bridging two programming language: you have to learn a lot about the fundamentals of the two languages. As I love to learn, and I’m pretty fond of both D and Objective-C, building that bridge was the natural thing to do for me.

Early Bridge

D is a language capable of accessing C functions directly: you just need to declare them as extern (C) inside a D code file and they’ll be made available (provided you link to the right libraries afterwards). So basically, since the whole Objective-C runtime is accessible from C calls, it’s pretty easy to do whatever we want with it.

With the Objective-C runtime you can do introspection, or to create new classes and methods. Methods are pretty easy to implement too: D functions are called with the C ABI, which means that they’re callable from C code. A function in D only need to have the right prototype to be able to receive Objective-C messages.

But on the other side, D is a statically-typed language, in the same spirit as C++. This means that very little information is known at runtime about D objects: their name, their members, their methods, almost all of this disappear once the program has been compiled. This also mean that you can’t dynamically add classes or methods like you can do in Objective-C.

So the early version of that bridge was pretty simple: there was a couple of D classes which were wrapping their Objective-C counterpart. For instance, D class NSObject contained a pointer to a corresponding Objective-C object instance and could use objc_msgSend to call methods on it. This works, until you try to actually do something useful, like a subclass. Since Objective-C is completely unaware of that D class, it can’t call any of its methods. If you override NSObject to do something useful, you better not count on Cocoa calling that method: it doesn’t exist to the outside world.

So basically, that method has to be defined as a method of an Objective-C object to work. We’ll get to that in a moment.

Object Posing

The key to a successful bridge in object-oriented languages is to make objects seemingly transferable between the two languages. In the D/Objective-C Bridge, this is done by proxy objects posing an object in the foreign language. There are two kind of proxies in the current implementation of the bridge:

  • a capsule is an Objective-C object which serves as a proxy to a D object so that it can be sent as a parameter to a function expecting an Objective-C object. The process of creating a capsule for an object is called encapsulation and retrieving the object from a capsule (when a function returns a capsulated object for instance) is called decapsulation.

  • a wrapper is a D object representing an Objective-C object within D code. When decapsulating an Objective-C object, after checking it isn’t a capsule, a wrapper D object is created to represent that Objective-C object. When encapsulating a D object, if that object is a wrapper, instead of creating a capsule the wrapped Objective-C object is returned.

That process of encapsulation/decapsulation repeated every time an object passes through a cross-language function call, either as an argument or as a return value. Clearly, this becomes tedious fast-enough.

Templates to the Rescue

Just like its cousin C++, D has templates. Templates allows what we call metaprogramming: code which create code. D supports metaprogramming only at compile-time (just like C++), but this allows us to perform a lot of work. Templates are used to encapsulate and decapsulate function arguments and return values as needed depending on their type. For instance, a function which call an Objetive-C method would be like this:

Object opIndex(Object key) {
    SEL selector = sel_registerName("objectForKey:".ptr);
    id key_id = encapsulate(key);
    id result = objc_msgSend(self, selector, key_id);
    return decapsulate(result);
}

With the proper template, it now becomes this:

Object opIndex(Object key) {
    return invokeObjcSuper!(Object, "objectForKey:")(key);
}

The invokeObjcSuper template function accepts any number of argument and will properly convert them as needed based on their type. Note that the first example above, the one without the template, is pretty much alike what you can do in plain C.

D templates makes it easy to convert arguments and return values on the fly, but what about receiving method calls from the Objective-C side? Well, there is a template for that too. In D, you can mixin a template’s content in the current context. Used this way, a template can be used to add methods and variables to a class, which is what we use here. Continuing from the previous example, here is how one woud bind opIndex to the objectForKey: selector of an Objective-C capsule class:

mixin ObjcBindMethod!(opIndex, Object, "objectForKey:", Object);

Basically, the syntax reads like this: bind method opIndex to selector objectForKey: with return type Object and one argument of type Object. Mixing in this template creates a receiver method suitable for calling from Objective-C, and a method_info structure to be given to the Objective-C runtime when initializing the class. Object arguments are decapsulated, and object return types are encapsulated by the binding method, all this is done completely transparently to the programmer.

Exceptions

What about exceptions? Both D and Objective-C have exceptions, but in implementation they’re incompatible. D catch and finally statement (as well as scope (failure) and scope(exit) and destructors for scope-qualified objects) won’t be called when the stack is rewinded at the result of an Objective-C exception. The same applies to Objective-C code whenever a D exception is thrown. So when you have D code which calls Objective-C code which calls D code which calls Objective-C code, things can become quite messy when an exception throws in.

Note that Objective-C++, which is a mix of Objecitve-C and C++ and which is supported by Apple has this exact same problem. As of now, this is unresolved for Objective-C++. But the D/Objective-C bridge solves that.

There is an “exception bridge” in the D/Objective-C bridge. The exception bridge catches Objective-C exceptions raised during a call to Objective-C, wrap them into D objects, then throw that object back. The exact same thing is done in reverse: when D code is called from Objective-C, if an exception is thrown, it gets encapsulated into an Objective-C exception, and raised.

The templates for calling Objective-C methods and binding D methods to selectors use the exception bridge to make the process completely transparent. So you don’t have to worry about exceptions when using the D/Objective-C bridge: catch them and throw them as in any D program.

Class Hierarchy

The class hierarchy becomes a funny thing in the D/Objective-C bridge. As stated earlier, the bridge has two kinds of proxy objects: capsules and wrappers. Capsules are Objective-C objects posing for a D object; wrappers are D objects posing an Objective-C object. That’s all convenient, but how does polymorphism works in all that? Let’s look at wrappers first.

Wrappers

Wrappers are descendent of ObjcWrapperObject (in the objc.wrapper module), but that’s mostly an implementation detail you should ignore. The first wrapper you should worry about is called… NSObject! The D class NSObject is a wrapper for the Objective-C class of the same name. Confused? From now on, I’ll call it the NSObject wrapper, and the object it wraps will be called its Objective-C instance.

The NSObject wrapper implements methods which simply calls their corresponding methods on its Objective-C instance, methods alike the opIndex example above using the invokeObjcSuper template. This wrapper is the base of all wrappers, just like NSObject is the base of all objects in the Cocoa hierarchy. Therefore other wrapper classes, like NSString, inherit from NSObject, and thus inherit all the methods of NSObject.

When an Objective-C object is decapsulated, the bridge first checks if a corresponding wrapper has been registered (we will get to registration later). If no wrapper class is found, the bridge will search using the Objective-C object’s superclass, super-superclass and so on, until it find a matching wrapper. Eventually, a corresponding wrapper will be found, and a wrapper object will be created. In the “worst-case” senario, a NSObject wrapper will be returned.

So basically, the NSObject wrapper can wrap all Objective-C objects. This fits, since all Objective-C objects are instances of NSObject. And since no more specific wrapper has been registered for a given object, it’s probably that you don’t need to know about the more specific object anyway, so nothing is lost.

Capsules & Subclassing

So capsules are those Objective-C objects posing for D objects inside Objective-C code. The capsule for a regular D object is an instance of the Objective-C class called D_Object. This class will simply forward method calls for isEqual:, hash, and description to their counterparts in the base D Object class, namely opEquals, toHash, and description (converting types as necessary). Objective-C is is therefore able call these methods on any D class.

Overriding and defining methods is achieved by subclassing. If you override one of the three already bound methods above, you don’t need to do anything special to get them working from Objective-C. If you wish to add methods and want those methods to be accessible from Objective-C, each of them need to be bound in a Objective-C capsule class corresponding to your D class. That capsule class is automatically created on the first use of the ObjcBindMethod template, using the name of your class as the name of the class in Objective-C, so you should rarely need to worry about the Objective-C class under the hood.1

Now, what about subclassing an existing Objective-C class? That’s easy too. Each wrapper class has a corresponding capsule. The capsule for the NSObject wrapper is called D_NSObject, the capsule for NSString is called D_NSString, and so on, but you don’t really need to worry about that unless you’re debugging. If you override a method of a wrapper which has been bound to its corresponding Objective-C capsule class, the bridge will dispatch the call to your method. If you wish to bind a new method to an Objective-C selector, you can do it just like you would for other objects, using ObjcBindMethod. It’s that simple.

There is a notable exception: cluster classes. Cluster classes in Objective-C are classes like NSString, NSArray, NSDictionary, etc. for which the initializer returns a different object. For these classes, you’ll need to do the traditional alloc–init sequence from your D class constructor. If you don’t, you’ll end up with the wrong capsule class, methods won’t be forwarded and you’ll get exceptions when using your class. For other classes, most of them really, you can just call one of the superclass constructors and be done with it.

In some cases, you’ll want Objective-C code to be able to create instances of some of your subclasses. This is particularly interesting for objects you want unserialized from a nib file. For that you need to bind a constructor to an initializer method. This can be done with the ObjcBindInitializer template, which is used like that:

mixin ObjcBindInitializer!("initWithObject:", Object);

This will bind selector initWithObject: to the constructor taking one argument of type Object.

Class Registration

There are two kinds of registrations, which are handled, mostly, in a transparent manner.

When crossing the D/Objective-C bridge, objects are decapsulated on the fly. Capsules are no problem to decapsulate: since they already exist as D objects, the D object can be found easily. But for wrapping Objective-C objects into D wrappers, the bridge must know which D class maps to which Objective-C class. Wrapper classes know how to register themselves with the bridge the first time they’re used, and generally you don’t need to worry about that.2

Registration works the other way around too. For Objective-C to know about a D class, the class has to be registered with, or added to, the Objective-C runtime. Again this is done transparently on the first use of the class. There is a specific case however which may force you to register the class explicitly: when Objective-C code is expected to create an instance of your class. This happens when loading nib files for instance.

So for these cases, you simply need to get the objcClass property of the object you want to register. YourDClass.objcClass returns a pointer to the Objective-C class for your D class (which you can ignore), and getting this property will initialize the capsule class and register it both ways.

Future Directions

The biggest challenge yet will be creating bindings for Cocoa as a whole. Creating wrapper classes is still a manual task. As there’s no way to add classes dynamically in D, we can’t create them at runtime by inspecting defined Objective-C classes. Moreover, in D, objects are constructed much differently from Objective-C, and any attempt to bridge that automatically isn’t likely to give good results.

Having to define wrappers manually may seem inconvenient, but it’s also an opportunity to make bindings better suited for D. For instance, the wrappers for NSString, NSArray, and NSDictionary I’ve taken advantage of D operator overloading to make them behave almost exactly like their language-defined counterparts (D arrays and associative arrays), and many method names have been shortened because D supports function overloading.3

There is also a lot of improvements and optimisations to be done to the bridge itself. The method-call bridging routines for instance generate more code than is necessary and can be confusing in a stack trace because of the many template function calls involved.

Today

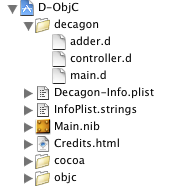
I’ll finish this by telling you that you can try out the D/Objective-C bridge today. I’ve added it as a project to the project section of my website. The Xcode project includes the bridge, a small part of the Foundation and AppKit frameworks I’ve created wrappers for, and a demo application called Decagon. The whole thing is available under the GPL license, version 3.

Oh, and by the way, if you’re unfamiliar with D, I suggest you take a look at the official website for the D programming language.


  1. Be careful about the name of your class when adding Objective-C bindings. In D, you can define two classes with the same name if they are in different modules; Objective-C class names are all in the same namespace so are more likely to clash. You can mixin the ObjcSubclass template to specify a different class name for the capsule class. ↩︎

  2. I say generally because sometimes, especially when casting objects to derived classes, you may need to make the bridge aware of that particular class prior retrieving that object so that it’ll be wrapped to a more specific wrapper class than what the getter method requires. ↩︎

  3. In D, you can use NSArray and some other Foundation classes much like you’d use a regular array:

    NSArray array1 = new NSArray(["test".toNSString()]); // create from D array
    NSArray array2 = array1 ~ array1; // concatenate array with itself
    
    // loop using foreach
    foreach (index, object; array1) {
        NSLog("%d: "~ object.toString(), index);
    }
    
    NSMutableArray array3 = new NSMutableArray;
    array3 = [new Object, new NSObject]; // assign mutable array from D array
    array3 ~= array2; // concatenate assign
    

    ↩︎


  • © 2003–2025 Michel Fortin.